Getting Genome Browser
To get Jsorolla you can add to your package.json dependency:
Using JavaScript version
First we should define our genome browser. This will contain the general structure of the genome browser and the karyotyope and chromosome panels. To draw these panels, genome browser will use the database "Cellbase" to which also it should be indicated which species we are using. You can see all the species available on Cellbase here.
The target parameter indicates the id of the component wherer the genome browser will be created, in the example there is a "div" called "application". Autorender to draw the only one. If this variable is false, it will be necessary to call the render function of the genome browser. Another parameter of configuration is if we want that the genome browser can be resizable or on the contrary, once defined the size this will be fixed.
let species = {id:"hsapiens", scientificName:"Homo sapiens", assembly:{name:"GRCh37"}};
let region = new Region({chromosome: "13", start: 32996311, end: 33000856}); //initial region
let genomeBrowser = new GenomeBrowser({
    client: cellbaseClient,
    cellBaseHost: CELLBASE_HOST,
    cellBaseVersion: CELLBASE_VERSION,
    target: 'application',
    width: document.querySelector('#application').getBoundingClientRect().width,
    region: region,
    species: species,
    sidePanel: false,
    autoRender: true,
    resizable: true,
    karyotypePanelConfig: {
        collapsed: false,
        collapsible: true
    },
    chromosomePanelConfig: {
        collapsed: false,
        collapsible: true
    },
    navigationBarConfig: {
        componentsConfig: {
        }
    },
    handlers: {
        'region:change': function(e) {
            console.log(e)
        }
    }
});
The karyotype and chromosome panels can be passed the configuration if the default is closed or not, or if it is possible to close it or it will always be open.
Line 22-24 are optional, and are useful if you want to add some custom settings to the navigation bar.
Finally we can add to the genome-browser handlers as shown in the example.
At this moment your genome browser would be started and it would look like this:
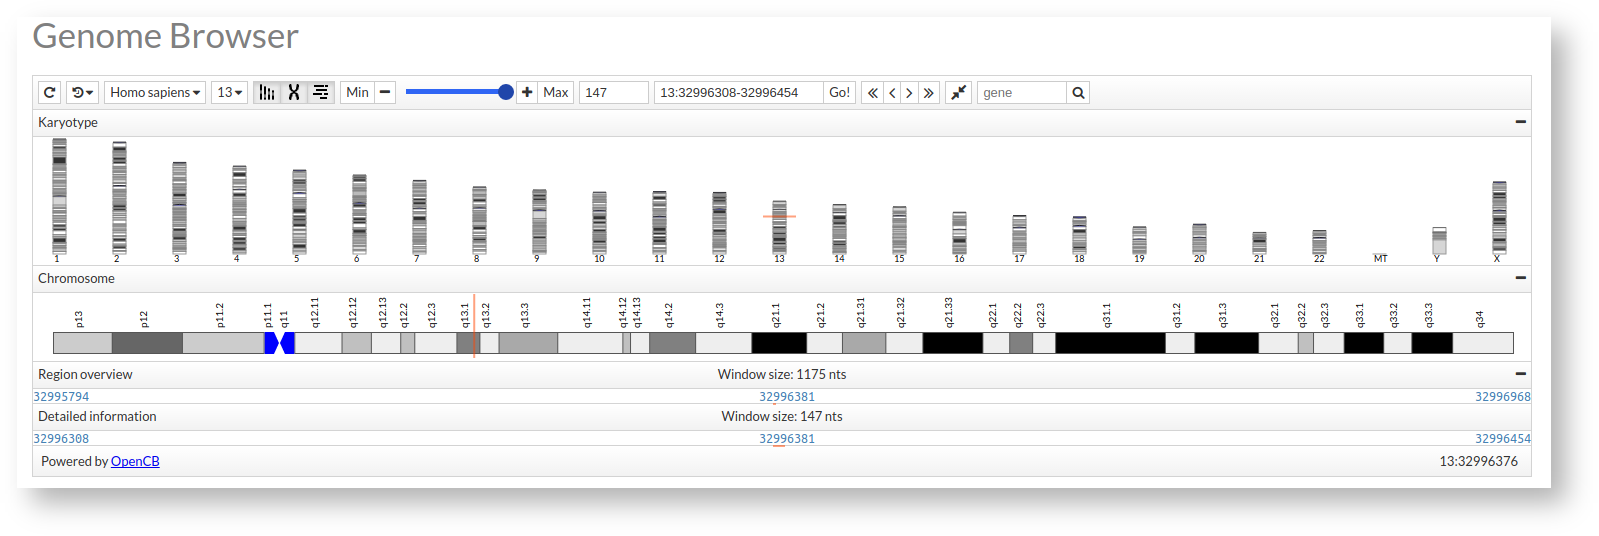
This would be basic form of the genome browser, to enrich it we can define a series of tracks or zones of visualization with different features as explained below.
Overview Track
The particularity of this track is that it has a different zoom to the rest. This smaller zoom (more remote), serves to have an overview of what is in that area soight while in the rest of tracks you see in more detail the zone.

We will define a FeatureTrack to which we will pass the renderer, the adapter and other parameters of configuration of the track like the title, the minimun size where it changes histogram(minHistogramRegionSize), the maximun size where the names of the components display (maxLabelRegionSize) or height.
FeatureRenderer is the renderer in charge of painting a boz for each feature. Adding the gene type (FEATURE_TYPES.gene) knows how to draw the color fo each feature and the tag among other things.
The data will be collected with a CellBaseAdapter, indicating that we want to collect the genes and exclude the transcripts since being a distant zoom if we painted them woild be difficult to visualize.
let gene = new FeatureTrack({
	title: 'Gene overview',
    minHistogramRegionSize: 20000000,
    maxLabelRegionSize: 10000000,
    height: 80,
    renderer: new FeatureRenderer(FEATURE_TYPES.gene),
    dataAdapter: new CellBaseAdapter(cellbaseClient, "genomic", "region", "gene", {
        exclude: 'transcripts,chunkIds'
    }, {
        chunkSize: 100000
    })
});
genomeBrowser.addOverviewTrack(gene);
Sequence Track

let tracks = [];
this.sequence = new FeatureTrack({
    title: 'Sequence',
    height: 20,
    visibleRegionSize: 200,
    renderer: new SequenceRenderer(),
    dataAdapter: new CellBaseAdapter(cellbaseClient, "genomic", "region", "sequence", {}, { chunkSize: 100})
});
tracks.push(this.sequence);
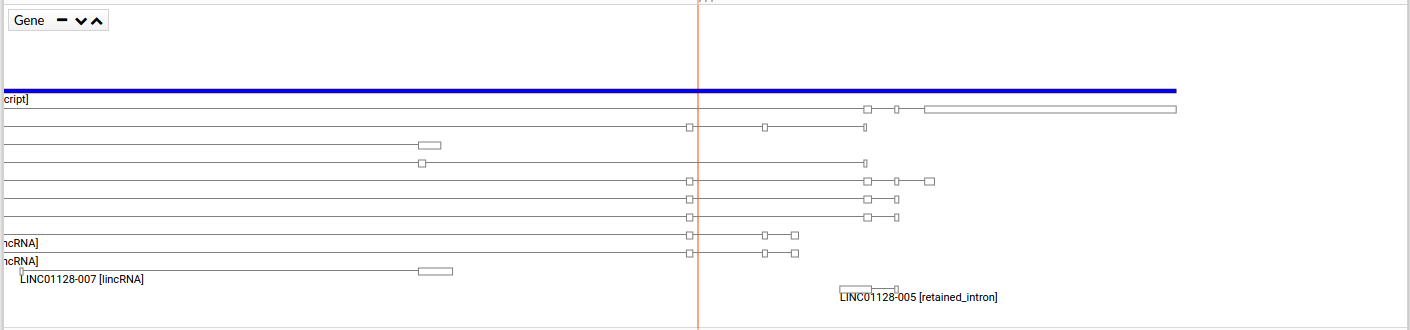
Gene Track
Variant Track
Aligment Track
Template Track
Using Polymer web component
To facilitate the use of the Genome Browser component, a WebComponent has been created that you can import into your html page.
In this tutorial you will learn how use this component for visualizate differents tracks.
In first time, you must import the component in your page.
<link rel="import" href="jsorolla/dist/core/webcomponent/genome-browser.html">
Subsequently, we will declare the genome component browser in our html code. For this we must know the list of parameters that the component accepts.
Here is a list of parameters that the component accepts and uses:
| Param | Type | Description |
|---|---|---|
| cellbase-client | Object | Client for use Cellbase. Necessary for: Gene track (using cellbase adapter, default). |
| opencga-client | Object | Client for use opecngaDB. Necessary for: Varriant Track and Aligment Track (using opencga adapter, default). |
| project | Object | To use opencga webservices, you will need to know which project the data to display. |
| study | Object | To use the opencga webservices, this will need to know in which study within a project, are the data to be visualized. |
| region | Object | Region where the genome-maps will initially be positioned. |
| species | Object | Species to draw. Default: homo sapiens. |
| width | Number | Component width. |
| active | Boolean | Enables or disables the component. If it is disabled the component will not be displayed.Default: false. |
| settings | Object | This parameter sets other settings of the genome maps that the user wants to pass. |
Finally, declare the component. In this case, we only defined the GeneTrack and Sequence track:
 <genome-browser cellbase-client="{{cellbaseClient}}" region="{{region}}" tracks="{{tracks}}" active="true">
 </genome-browser>
In the javascript part we will give value to the variables:
			CELLBASE_HOST = "bioinfo.hpc.cam.ac.uk/cellbase";
            CELLBASE_VERSION = "v4";

            let cellBaseClientConfig = new CellBaseClientConfig(CELLBASE_HOST, CELLBASE_VERSION);
            this.cellbaseClient = new CellBaseClient(cellBaseClientConfig);

           	this.region = new Region({chromosome: "11", start: 68177378, end: 68177510});
            this.tracks ={sequence: {type: "sequence"}, gene: {type: "gene"}};
We have created a cellbase client that will connecto to the Host "bioinfo.hpc.cam.ac.uk/Cellbase". If we do not want to change the installation of Cellbase, it is not necessary that we define the host and the version, but we initialize a client. With the parameter "region", we ask that the display is at "11:68177378-68177510". It's possible to not see these positions in the display where the painted region is shown, but you well see a window frame containing the region. This is because the genome browser adjusts the display to optimize the cache.
Finally, the last param is "tracks", in this case we want see the track "sequence" and "gene". We can define other types of tracks as follows:
- Individual Variant Track (for example SNP): {trackname: {type: "variant", config: {} }}.
- Family Variant Track: {trackname: {type:"variant", config:{samples:"sample1","sample2"}}}.
- Aligment Track:{trackname:{type:"alignment", config:{files:"bam1", "bam2"}}}.
Table of Contents: